What is a Risk Register?
A Risk Register lets you log risks, score them using your own criteria, visualize them on a heat map, and track mitigation over time — all built with Qooling's form builder, so you fully control which fields you capture.
Creating a Risk Register
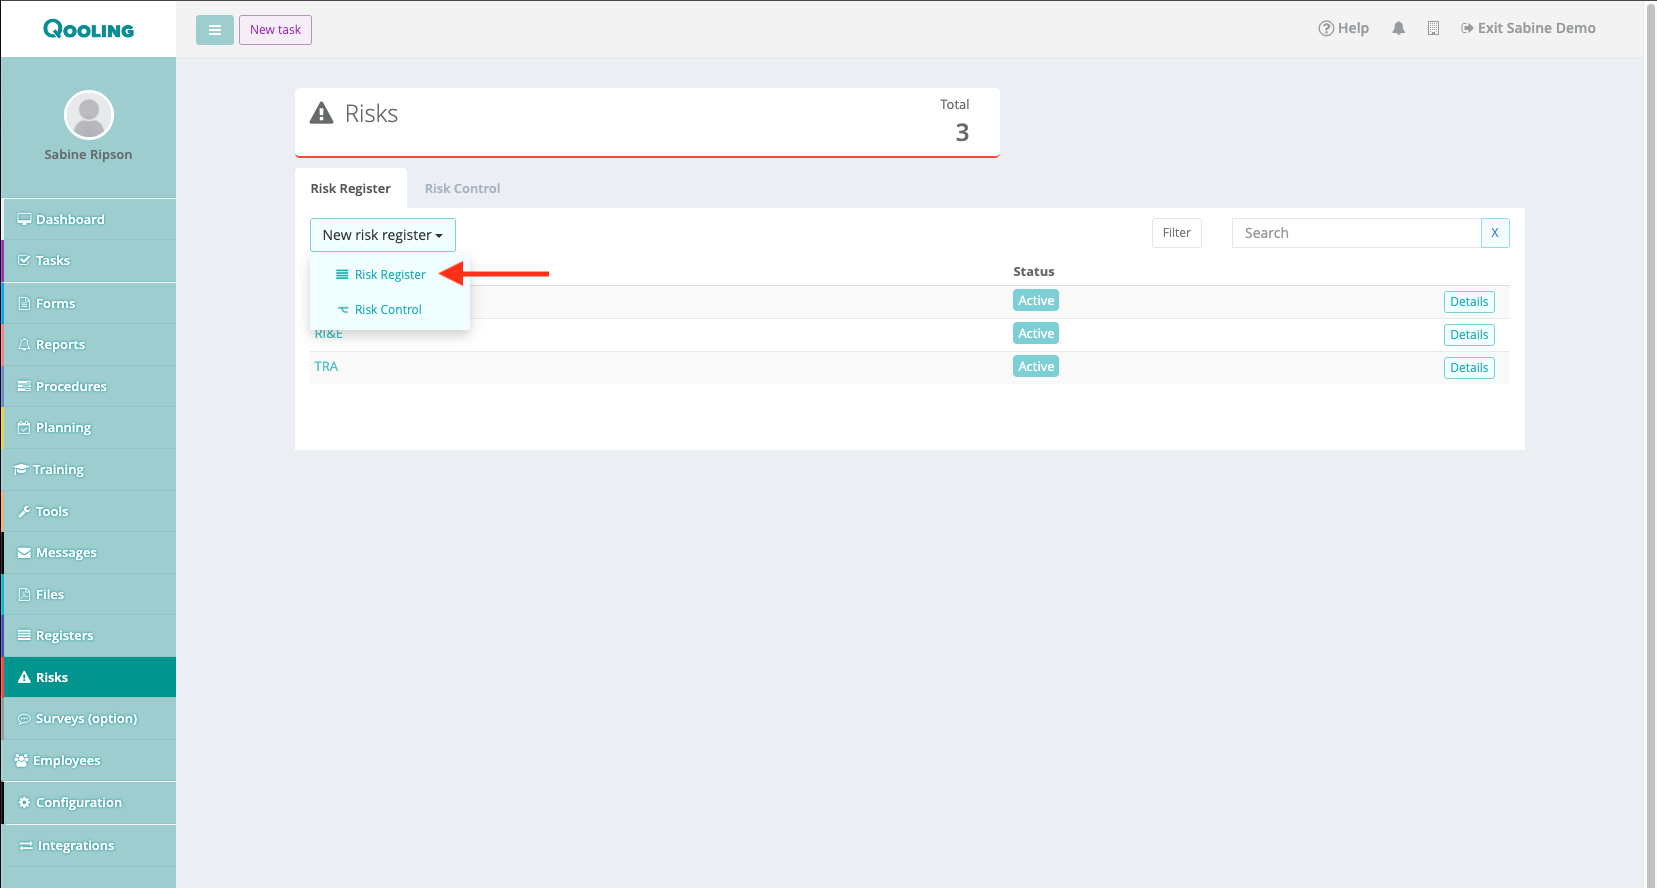
Go to the Risks module and click New Risk Register. Give it a name (e.g. "Standard Risk Assessment"). If you already have a register you'd like to reuse as a starting point, you can duplicate it instead of building from scratch.
This opens the form builder — the same one used across Qooling's forms module, so it's worth getting familiar with that if you haven't already. A typical register structure:
- Risk Description section — a select list for the scenario (e.g. Fire, Leakage, Electrical) and a text field where respondents describe the specific situation.
- Risk Assessment section — number fields for the variables you score on (e.g. Probability and Effect), plus a calculated field that combines them into a risk score using a formula (e.g. Probability × Effect).
- Risk Classification — a status list that buckets the calculated score into ranges (e.g. below 20 = limited risk, 20–70 = attention required, and so on), each with its own color. This drives the color coding shown throughout the register and on the matrix. Use RGB color codes rather than picking from a palette — they render more reliably.
- A description field with an instructional table explaining what values respondents should fill in for probability and effect, so your scoring stays consistent.
- A conclusion section with a text area for suggested mitigating actions.
You don't need to add user or date fields manually — Qooling automatically logs who created an entry and when. Add them explicitly only if you want that information visible as an editable field.
Once built, save the register.
Reporting a risk entry
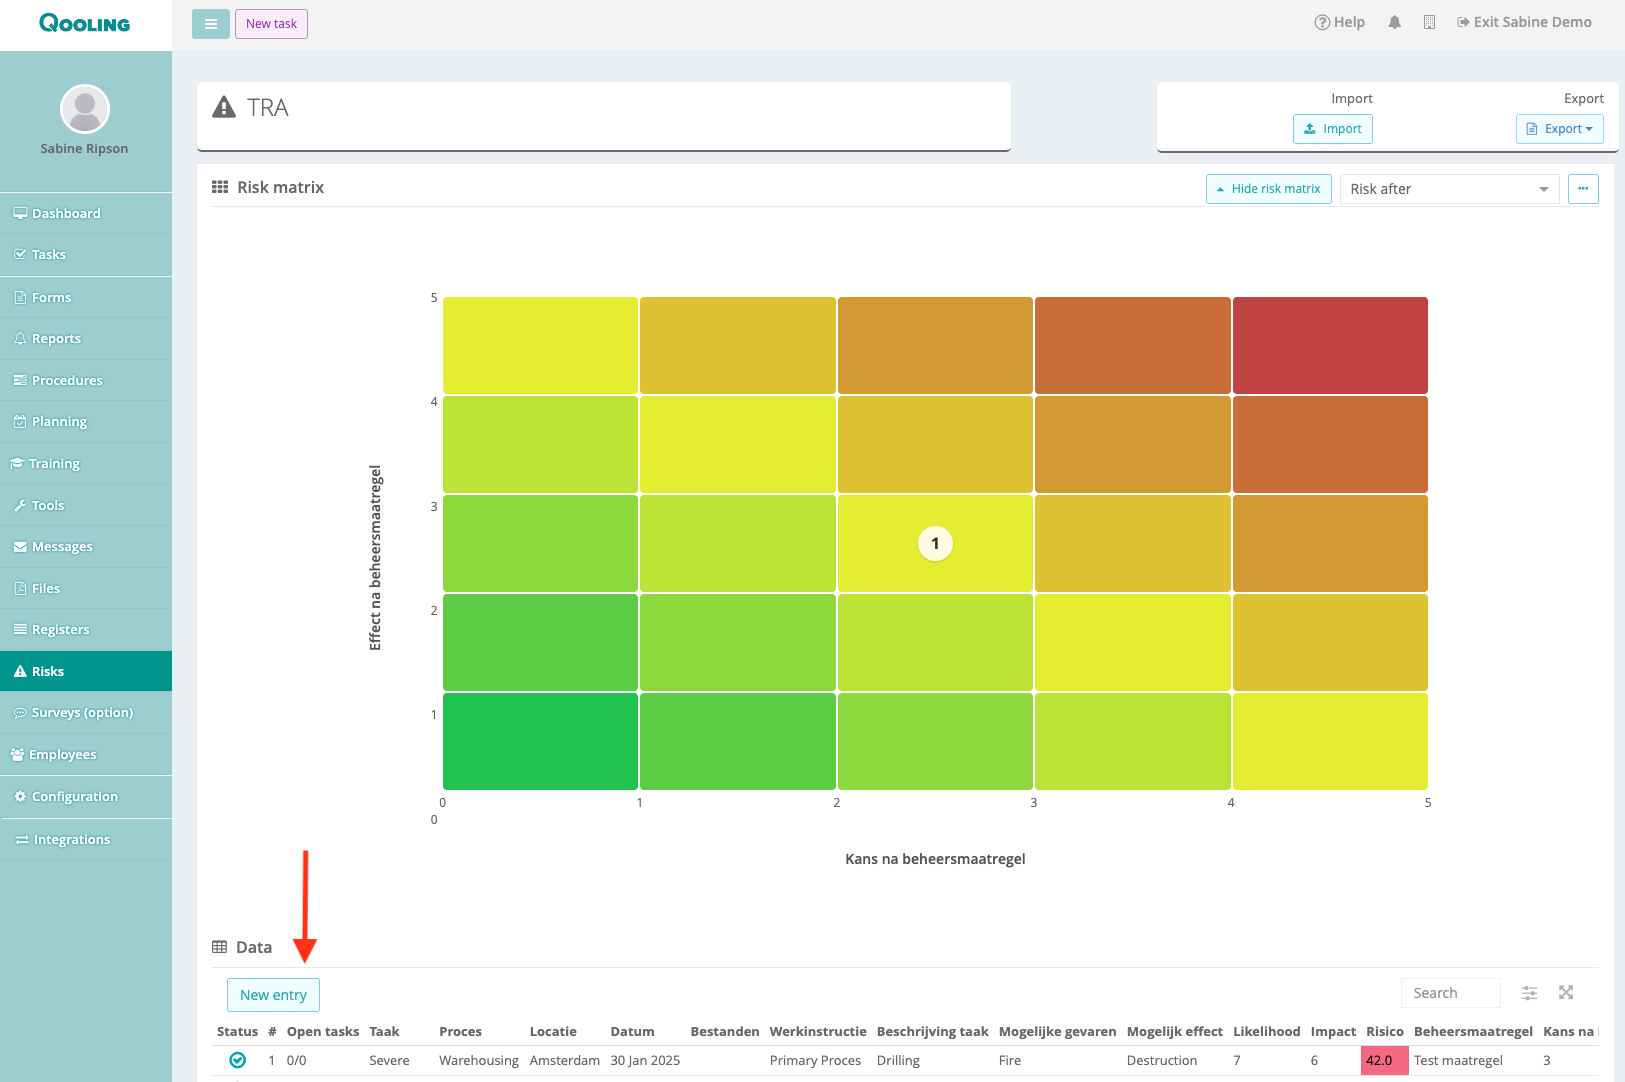
Open the register and click New Entry. Fill in the scenario, description, and your probability/effect scores — the risk score calculates automatically, and once you select a classification, the entry is color-coded accordingly. You can add suggested actions in the conclusion field right away, or leave it for later.
Bulk importing historical data
If you already have risk data elsewhere (e.g. Excel), you can import it in bulk:
- Go to Configuration → General and enable Import register instances via CSV (you may need to log out and back in for it to take effect).
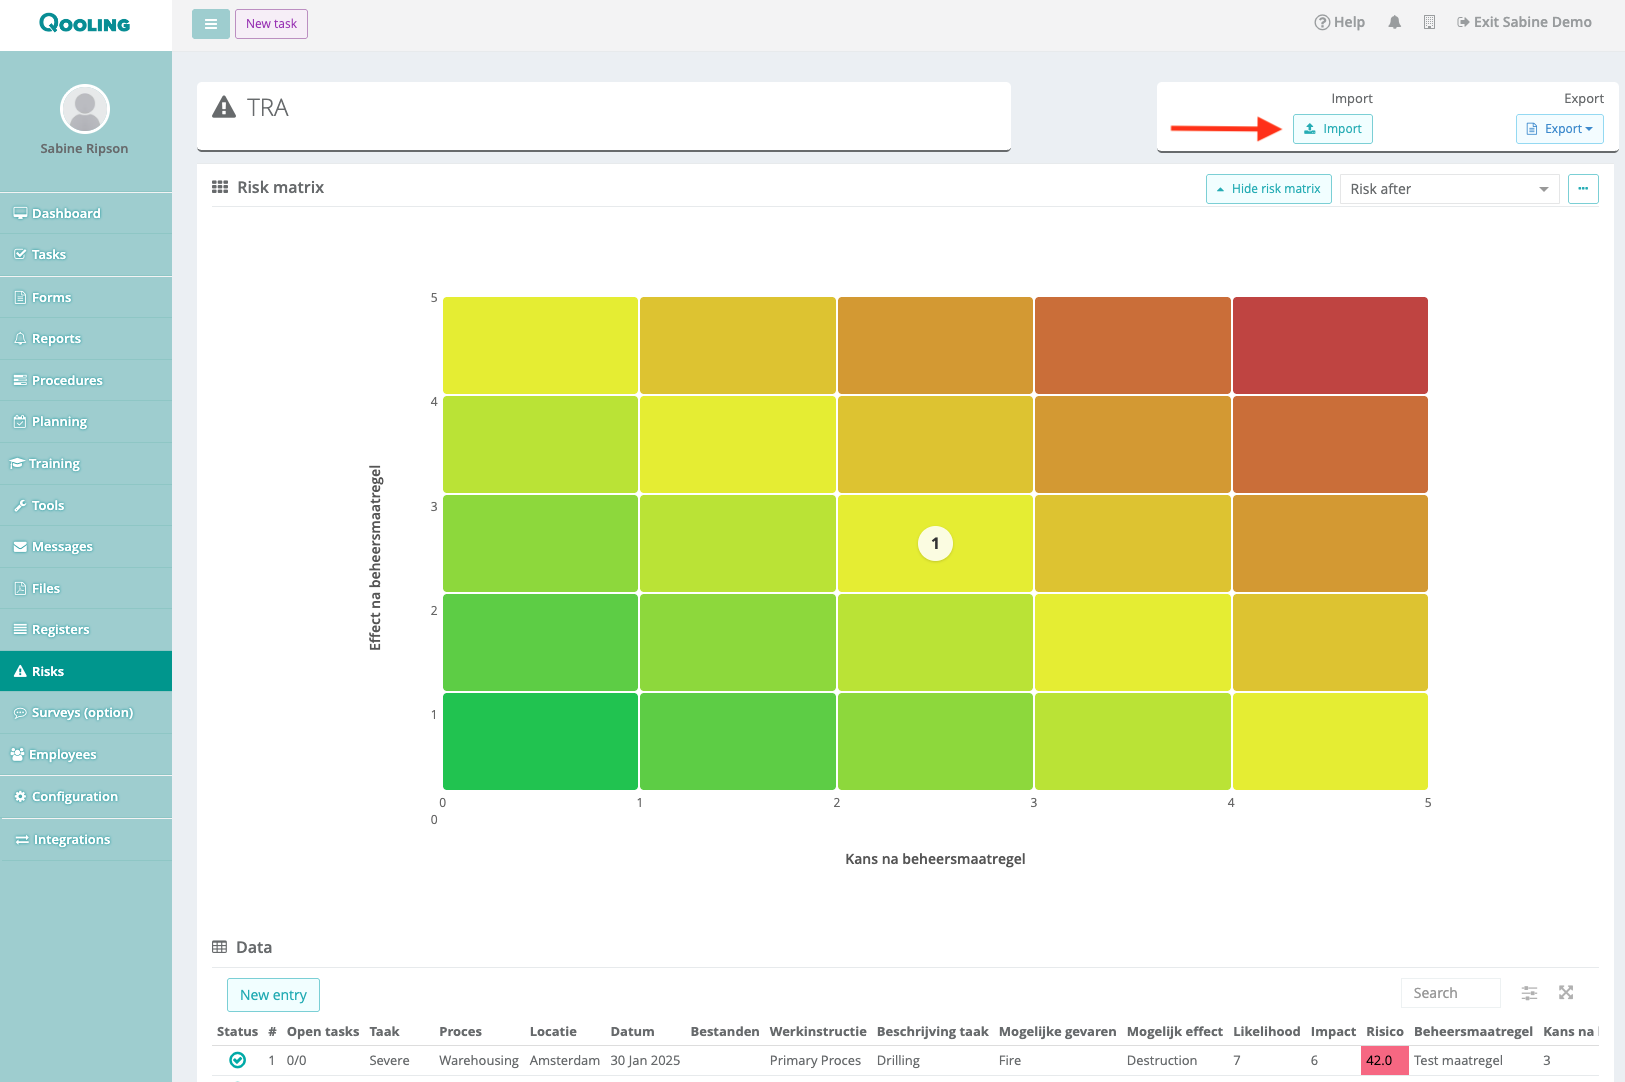
- In the register, click Import, select a file to see which columns need mapping, and copy those column headers into your own Excel sheet.
- Populate your data using the same options/values configured in your select and status lists — spelling, spacing, and capitalization must match exactly, or the import will fail for those fields.
- Save your file as CSV, then import it in Qooling. Most columns matching by name are auto-mapped; map any remaining ones manually. Calculated fields (like risk score) don't need mapping if their source fields are mapped.
Configuring the risk matrix
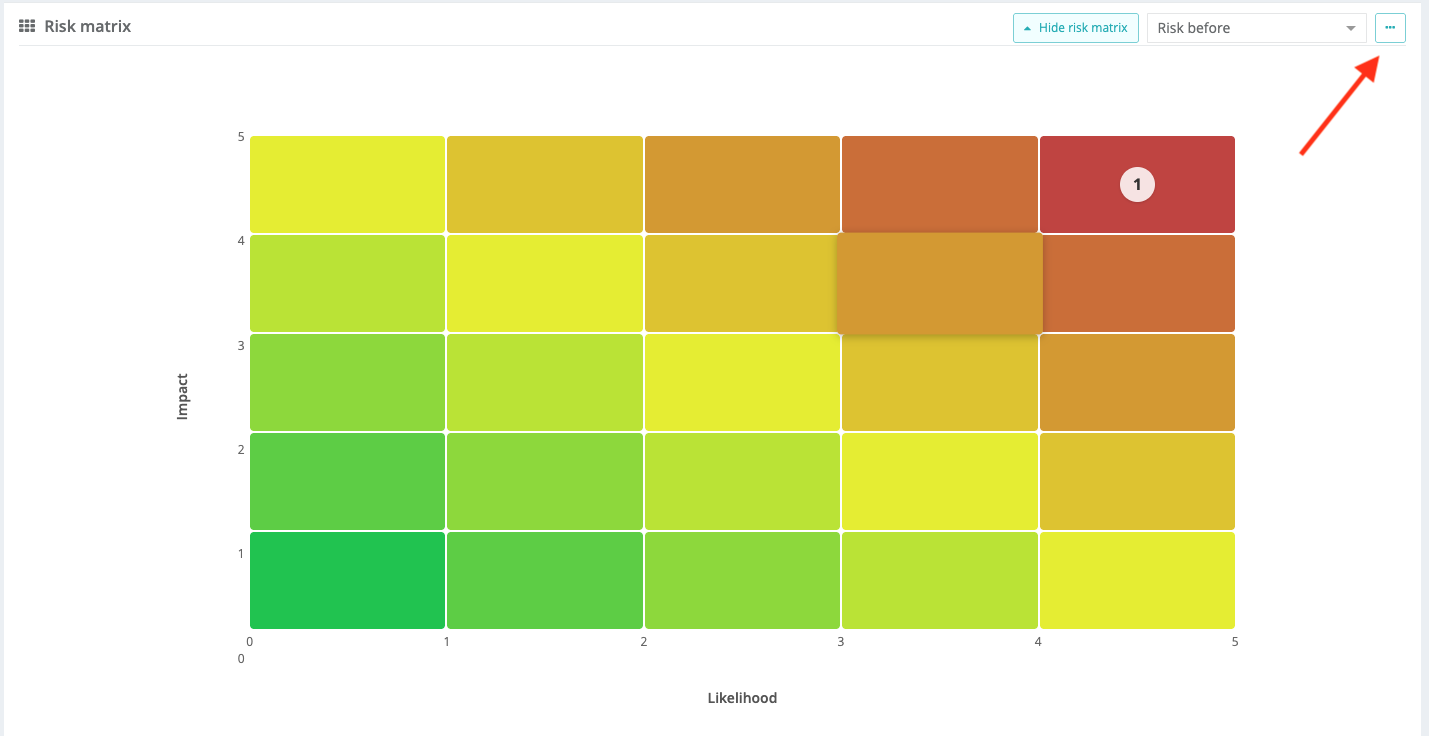
Click Configure risk matrix and choose two numeric fields to plot against each other (e.g. Probability vs. Effect). Set the scale for each axis based on the highest values used in your scoring instructions. This generates a heat map where each tile shows the IDs of the risks that fall into it — click any tile to open the underlying entries.
Matrices can be sized anywhere from 2×2 up to 10×10, the heat map draws the correct number of tiles for whatever size you configure, and you can create multiple matrices (e.g. one for safety, one for quality) and switch between them with a picker.
Reporting tasks and mitigating risks
From a risk entry (or directly from the matrix), you can raise a task to mitigate it: click the + button, choose a task type (normal, corrective, preventive, or recurring), assign it, set a due date, and optionally attach a photo or reminder. The task links back to the risk entry, so anyone working the task can see the full risk context, and anyone reviewing the risk can see task progress and outcome.
Once mitigation is complete, update the entry's scores (e.g. lower the probability) — the risk score and classification recalculate, and the entry's position on the matrix and its color update to reflect the reduced risk.
Navigating and managing entries
Within a register you can:
- Sort by clicking column headers, and use quick filters per column.
- Search across all fields.
- Expand the view for a larger working area.
- View the activity feed on any entry (via the three-dot menu) — every change, who made it, and related task history.
- Print an entry as a PDF risk report, including any task conclusions — useful as audit evidence.
- Delete an entry permanently (with confirmation).
Exporting and filtering
- Export entries as a PDF (per entry or as an overview) or as Excel/CSV — exports respect any active filters, so you can export just a subset.
- Filter using the filter button: toggle which columns are visible, filter by value, and save your configuration as a profile — personal (only you) or company-wide (anyone opening the register). Switch between saved profiles anytime.
Editing, duplicating, archiving, and deleting the register itself
From the register's details menu:
- Edit — reopens the form builder to add, remove, or change fields.
- Duplicate — copies the form structure (not the data) under a new name; useful for creating an updated version or a register for a different location. You'll need to reconfigure the matrix on the copy.
- Archive — moves the register out of the active list while keeping all its data; filter by "archived" to find it again, and reactivate anytime.
- Delete — permanently removes the register; this cannot be undone.
You can also restrict a register to specific user groups from this same menu, so only relevant teams see and use it.
Was this article helpful?
That’s Great!
Thank you for your feedback
Sorry! We couldn't be helpful
Thank you for your feedback
Feedback sent
We appreciate your effort and will try to fix the article